What do you think when you listen to the word DevOps? Do you understand the perfect meaning of this word or is it still confused? If you are in the IT field, then you probably come across this word very often. Did you google it before, and didn’t understand? Are you interested to know? Let’s jump on to the definition of DevOps:
DevOps is a set of practices that combines software development and IT operations. It aims to shorten the systems development life cycle and provide continuous delivery with high software quality.
This is the Wikipedia definition for DevOps. To simply deliver and make you understand this, it is a culture, which has been used in the industry for a long time now. But it is likely to be trending now. Developers team and the Operations team get to work together to decrease time to make a system/product etc. They get to collaborate and work as a team so that the work will be faster and efficient.
So, now I will talk about Azure DevOps and what it offers.
It is a Microsoft product that provides us various capabilities for the user:
- Version Control
- Reporting
- Requirements management
- Project management
- Automated builds
- Lab management
- Testing and release management
I will discuss mainly the Version Control and the Continuous Integration in Azure DevOps.
Prerequisites
- Microsoft Azure account.
- Any Version Control System like Git, TFVC (Team Foundation Version Control) by Microsoft.
Here, Git is an Open Source Distributed Version Control system whereas TFVC is a Centralised Version Control System.
Making our first Azure DevOps Project
- Visit the website https://dev.azure.com//
This contains information about all your projects for Azure DevOps.

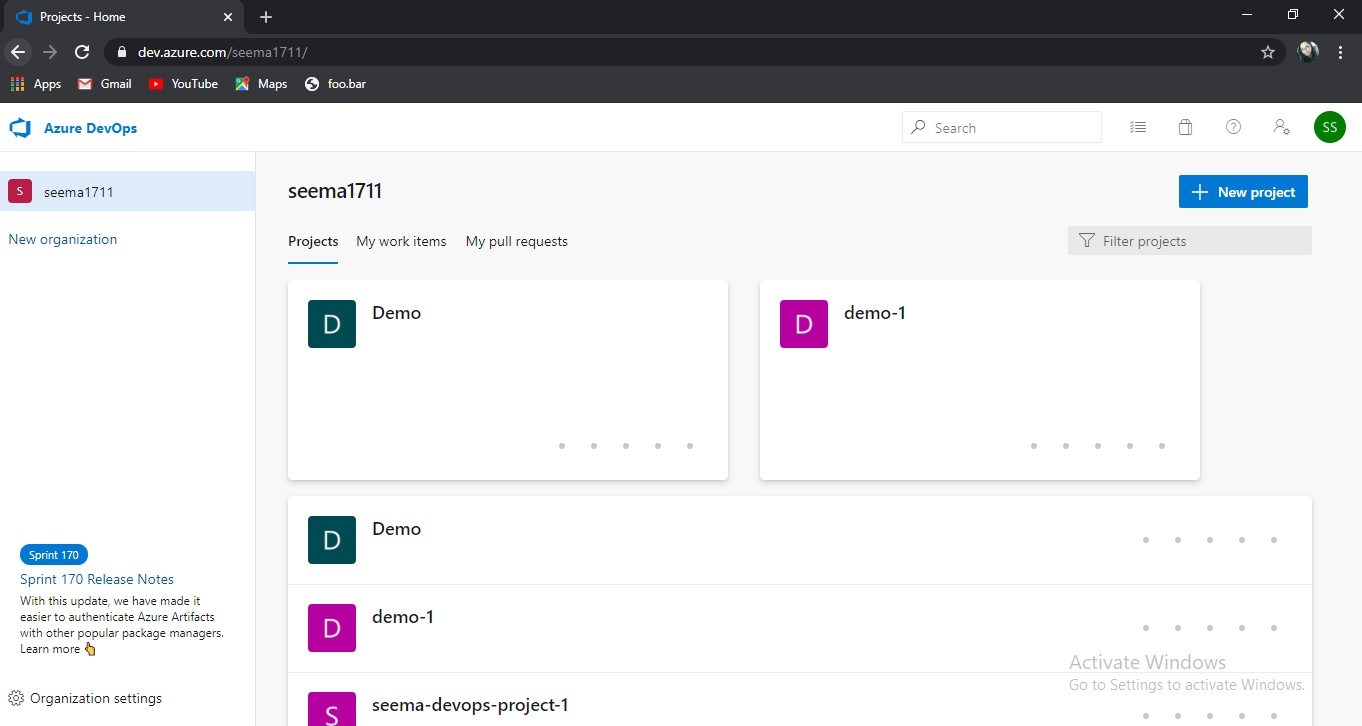
2. Now, to create a new project go to the New Project tab.


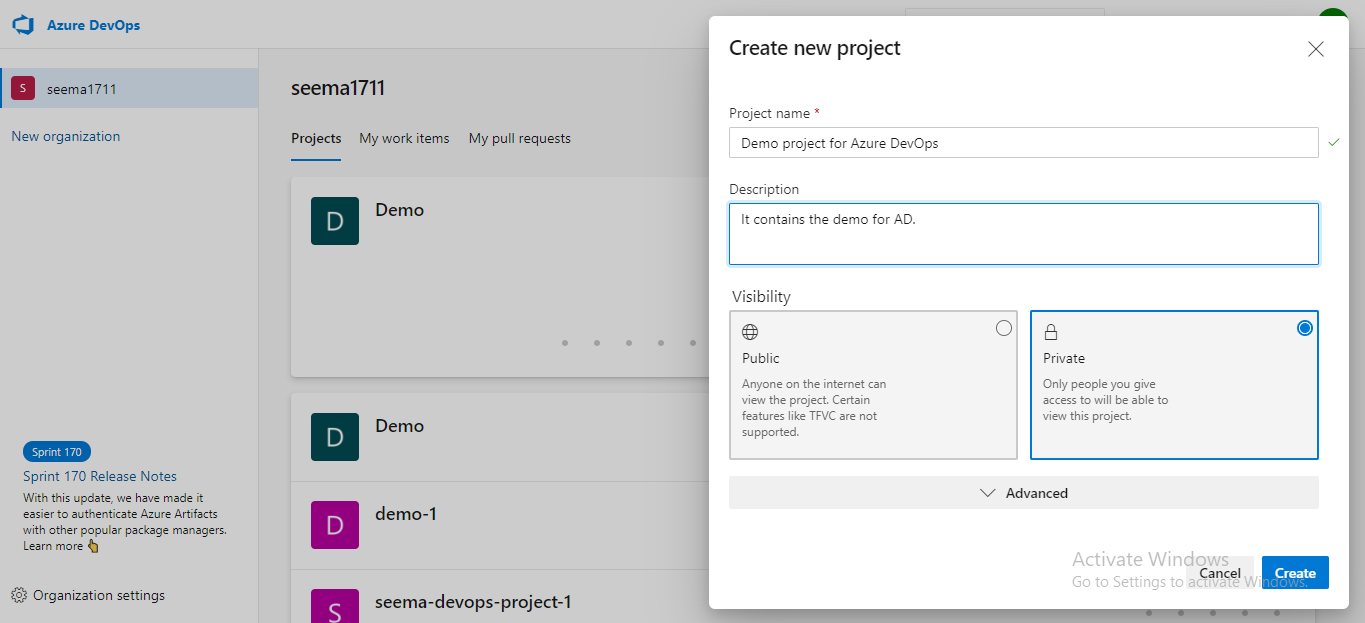
3. After clicking on the New Project, the portal will look like this. Here, add your project name, I have named it “Demo project for Azure DevOps” and you can give it a description about what this project does. Then there is an option for visibility if you want to give access to anyone then you can choose public else choose private, it will only be accessed by the ones whom will you give them access to.
Also, if you choose the Advanced option below, you will get the following options:

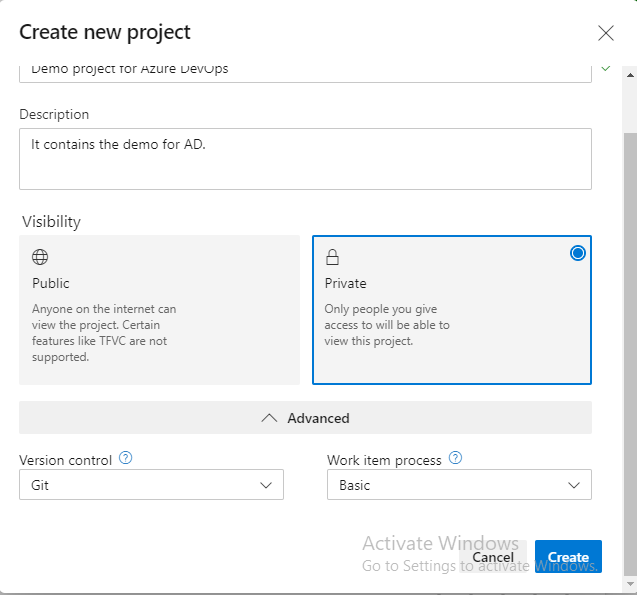
You can choose which version control you want to use, I will go with Git for now. And then click on create.
This screen will show up.

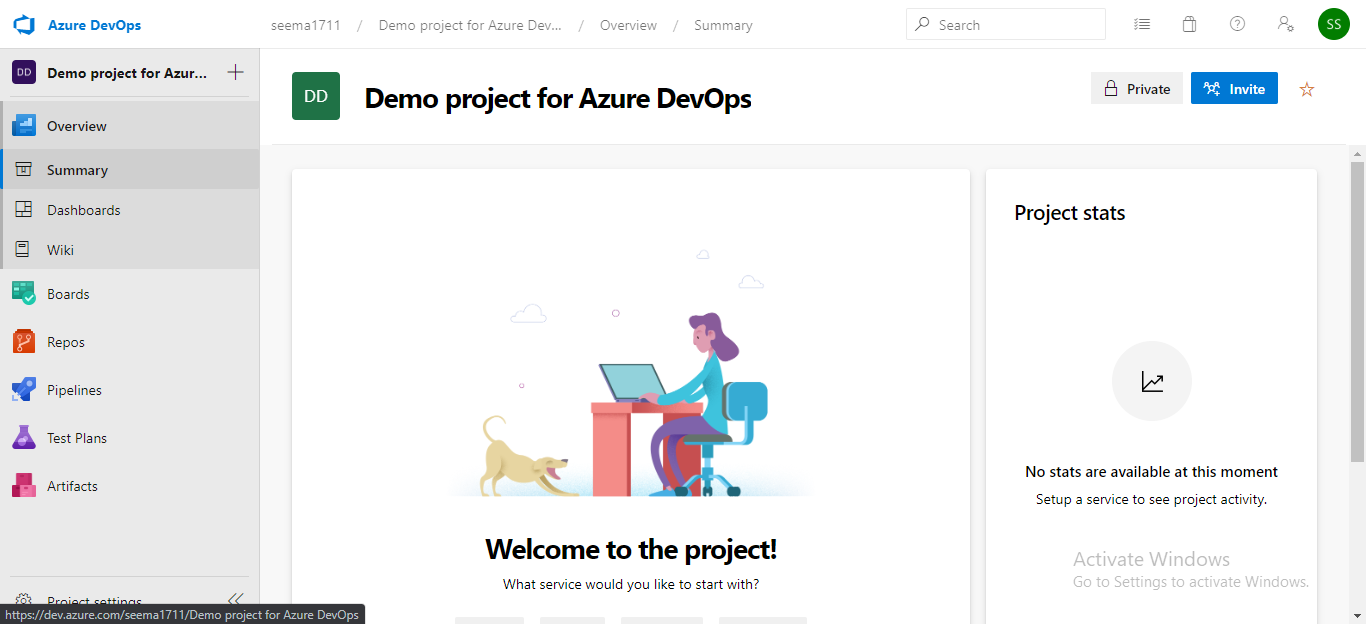
Hurray!! We have created our first Azure DevOps project.
Now, if you see on the left side of the screen, there are multiple options, what are they? Let’s find out!
Components of Azure DevOps

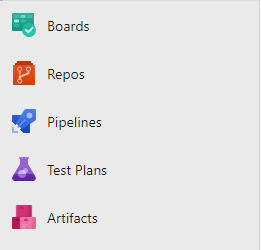
- Azure Boards: If you are working on a team or various teams are working on a single project, then they need to communicate better to provide good results to the product. Azure boards are a work tracking system like dashboards. They provide you great custom reports and also deals with the backlogs.
- Azure Repos: It is the collection of all your repositories. You can push, pull, and also commit your changes to your repositories. It provides you unlimited Cloud hosted private repositories.
- Azure Pipelines: It is a CI/CD i.e. Continuous Integration/Continuous Delivery, testing, and deployment system that can connect to any Git repository.
- Azure Test Plans: Your code/data might be not correct, that’s why we have test plans in Azure DevOps. It is a solution for tests and capturing data about defects.
- Azure Artifacts: It is a hosting facility for Maven, npm, and NuGet packages.Azure enables you to create, host, and also share packages among your team. Artifacts in Azure ensure your pipelines have fully integrated package management.
Now that you have a basic understanding of the components of Azure DevOps and also you’ve created a project. Let’s move further to add our project to the Azure Repos.
Adding project to Azure DevOps Repos
If you go to Repos and then select Files, you could see a screen like this.

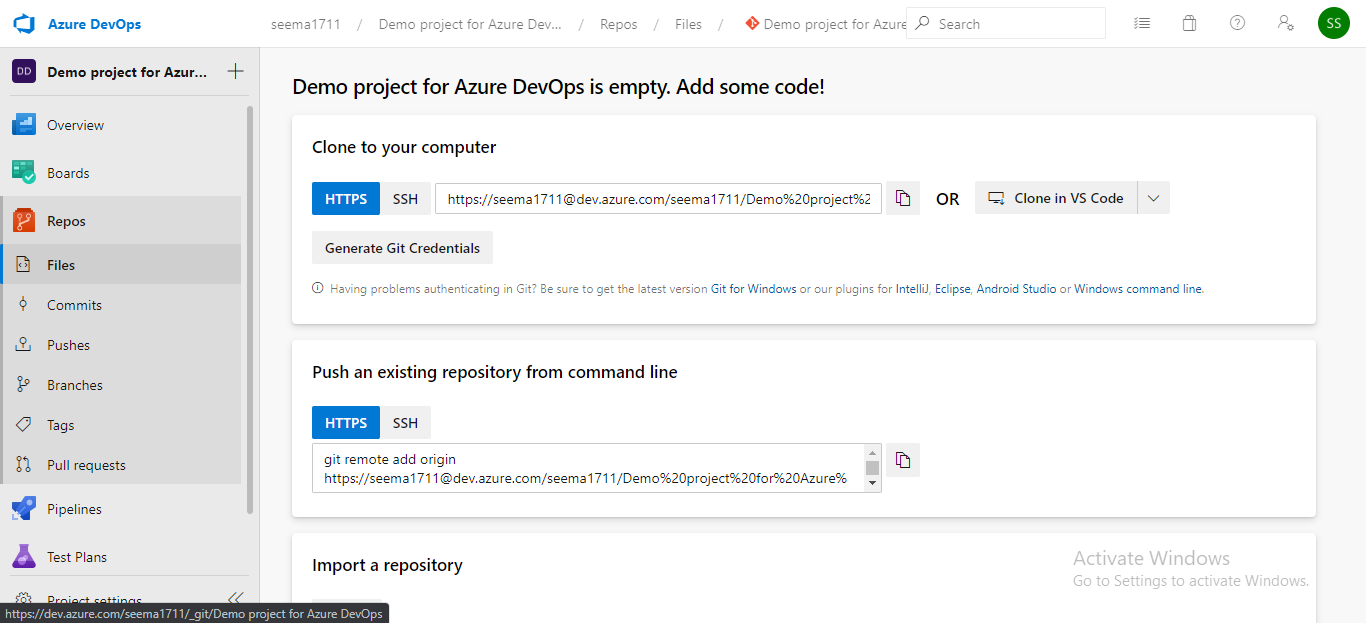
Now, I will create a local folder in my Windows system, where I will add some of my previous projects.
I have created a folder named Demo for Azure DevOps in my laptop and stored some Python code. Here, I am using Git Bash.
- Initialize the Git repository using the command “git init”. It will create a .git file in your folder.

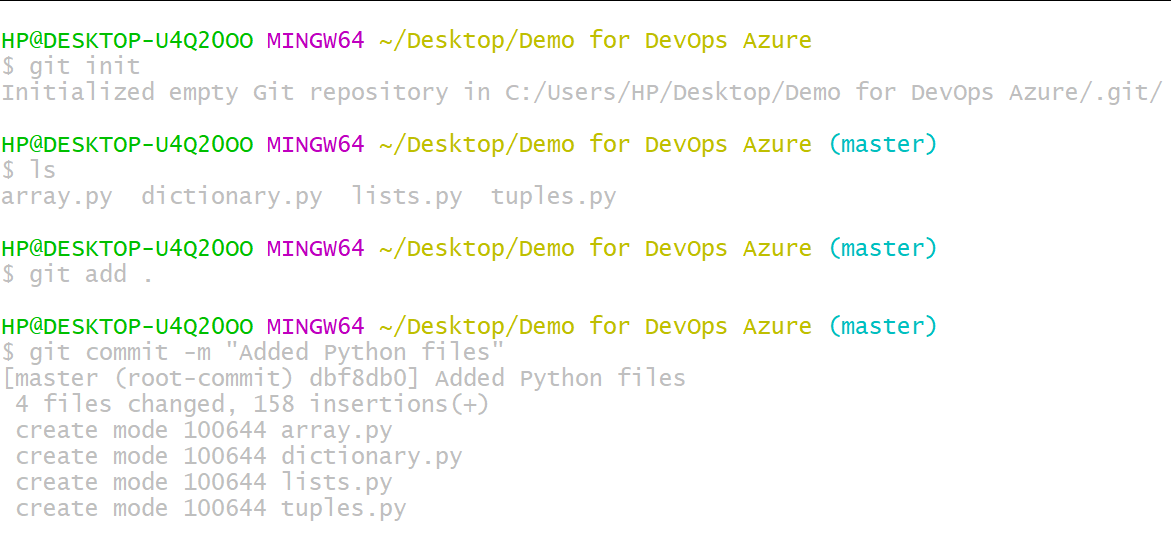
2. After initializing the git repo, add the files to the repository. Using the command “git add .”. It will add all the files, including .gitignore file if you have one.
3. Then commit the files with the message “Added python files” or whatever you would like to add.
4. Now, that you have added all the files in your repo locally, it’s time for you to upload or add the files to the remote repository in Azure DevOps.
Use these commands: You don’t have to worry about the commands, you just have to copy and paste them from here.


5. After pasting the commands in your git bash or Command line, it will look like this.

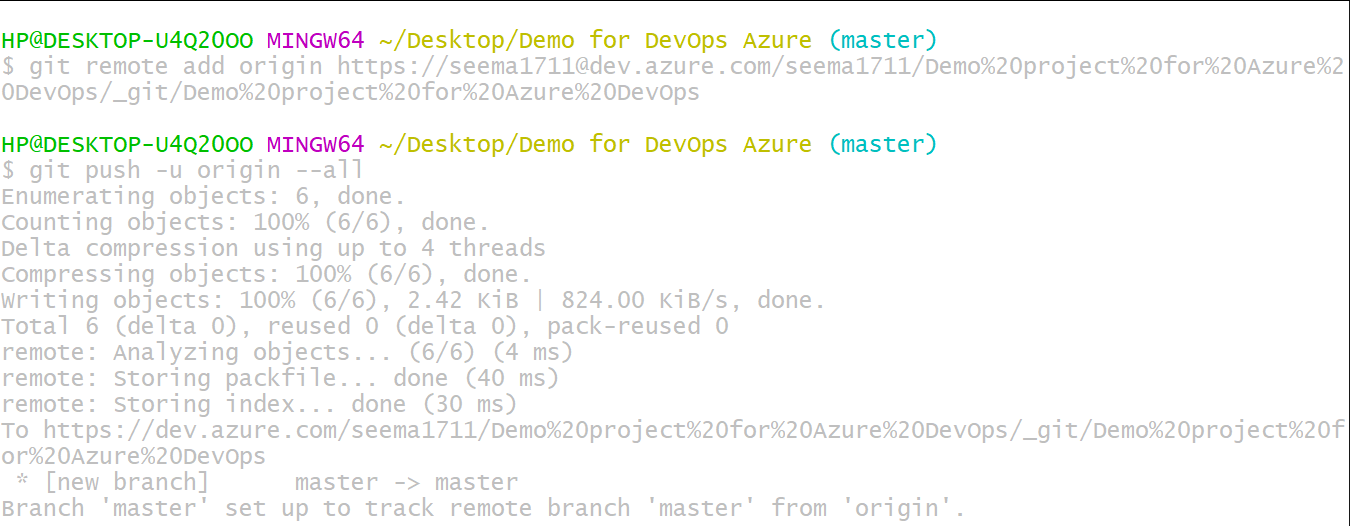
This means you have added all your files to the remote repo.
6. To confirm the changes, refresh the dev.azure.com.

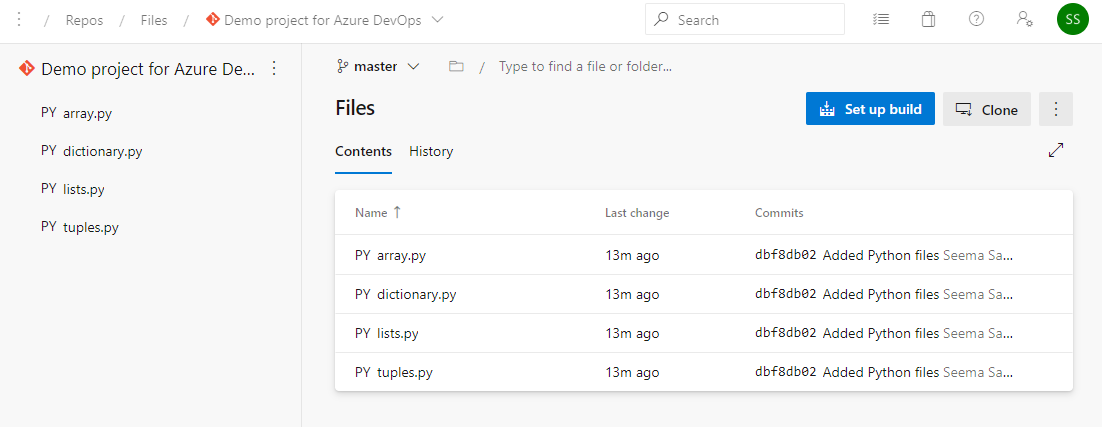
You can see the files I have added.
Setting up Continuous Integration using Git
- Go to the git repository.
- Now, go to Pipelines. And select New Pipeline.


3. Choose the Classic editor.

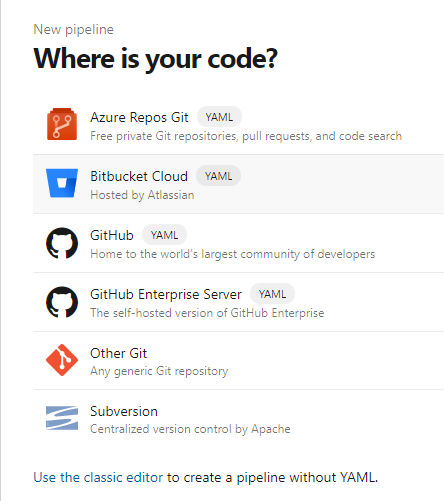
Since this is an Azure git repo, so I will select that.

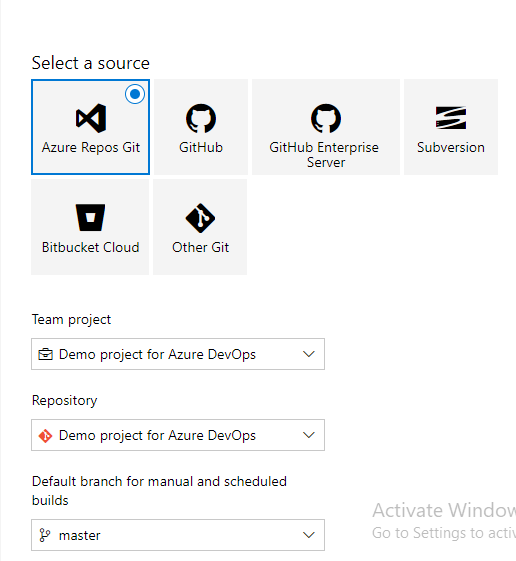
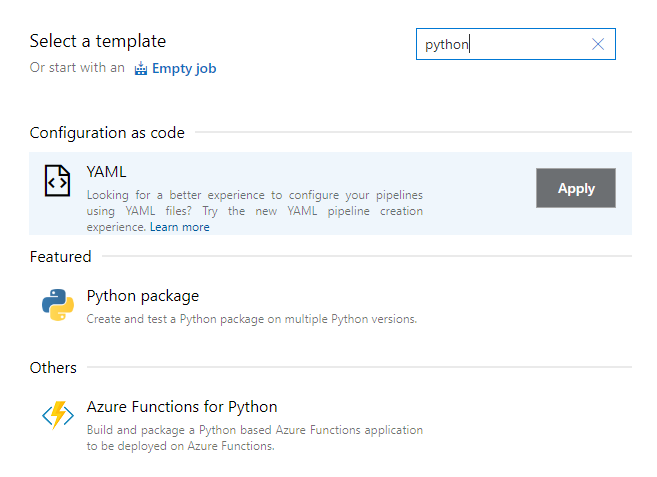
4. Then click on continue, on the next page you will find the option to select template, since I have python files, so I will choose Python package.

5. Now, go to triggers and check the “Enable Continuous Integration” option. Also, check the “Batch changes” option, so that if you have multiple commits, then it will merge all the commits into a single one.

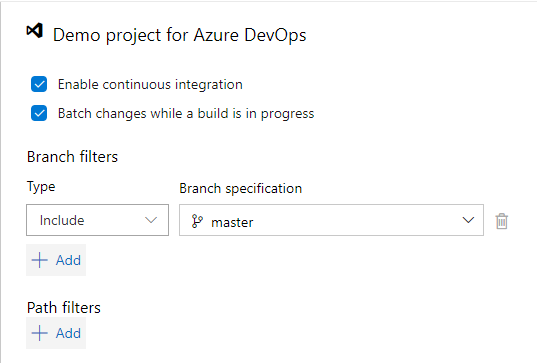
6. Finally select, Save, and queue and then select save.


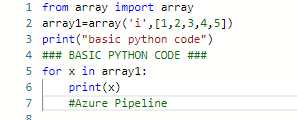
7. Now again go to repos. And make some changes to any file. Like I have added a new comment in the file i.e. Azure Pipeline. Then commit the changes.

8. Finally, go to pipelines and you will see that the pipelines are running automatically.
That’s all from my side. Keep learning!
